
Administer a Level Screener or Prescreener
The Level Screener is a great way to figure out where to start when trying to evaluate a reader whose reading level is unfamiliar to you. It is designed to give a quick view of the student’s reading level and help you determine which text to use first.
The Prescreener helps you determine fundamental literacy skills. If you’re unsure whether a new student has enough ability to even attempt a Level Screener, use the Prescreener to gauge their letter recognition and pronunciation.
To learn more about how to administer a Level Screener, watch the video or read the step-by-step guide below.
If you're looking for a particular section about Administering a Level Screener or Prescreener, use the links below to quickly move to that section:
Administering a Foundational Prescreener
Administering a Quick Word List Screener
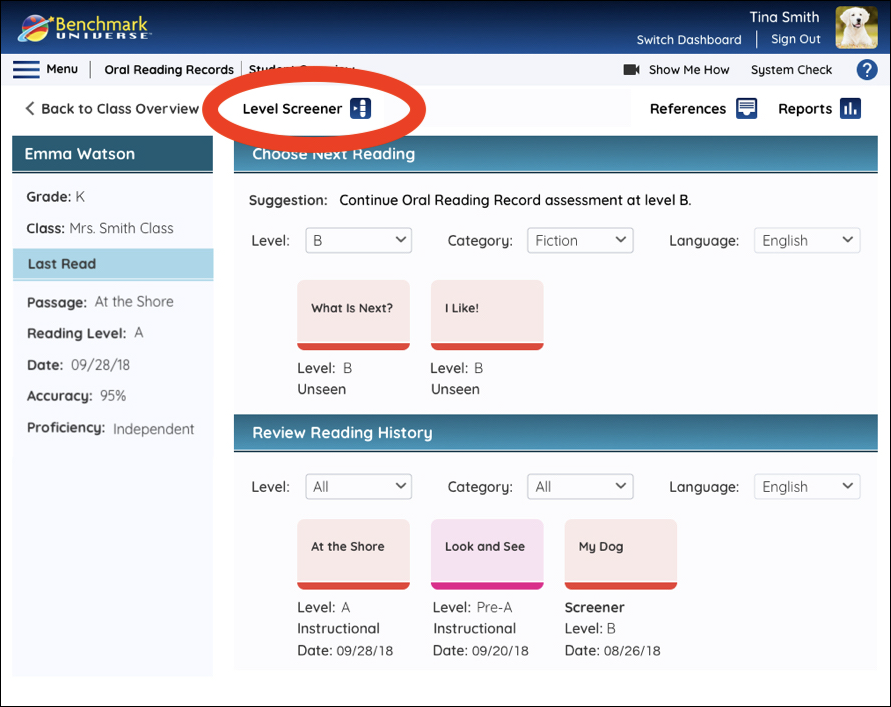
Select a Level Screener
Access the Foundational Prescreener, the Quick Word List Screener, or Screener Passages by selecting the Level Screener button on the Student Overview.
Select Screener Method
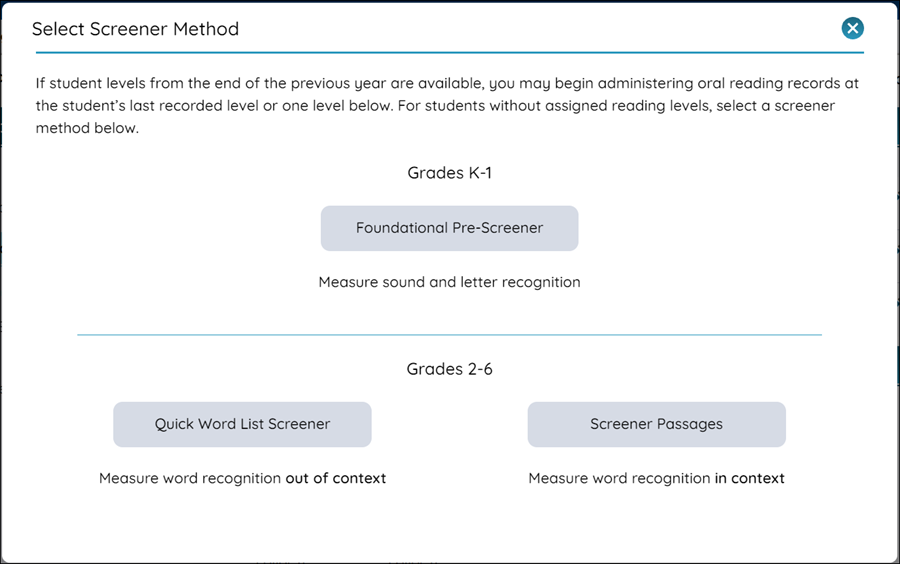
For students without assigned levels at Grades K-1, it’s recommended you use the Foundational Pre-Screener. For students without assigned levels at Grades 2-6, there are two options for placement screeners. Teachers may choose to use the Quick Word List Screener or the Screener Passages to optimize time with students.
Administering a Foundational Prescreener
When a K-1 student's level from the previous year isn't available, use the Foundational Prescreener button to determine their foundational reading skills.
Access the Prescreener by selecting the Foundational Pre-Screener button on the Select Screener Method page.
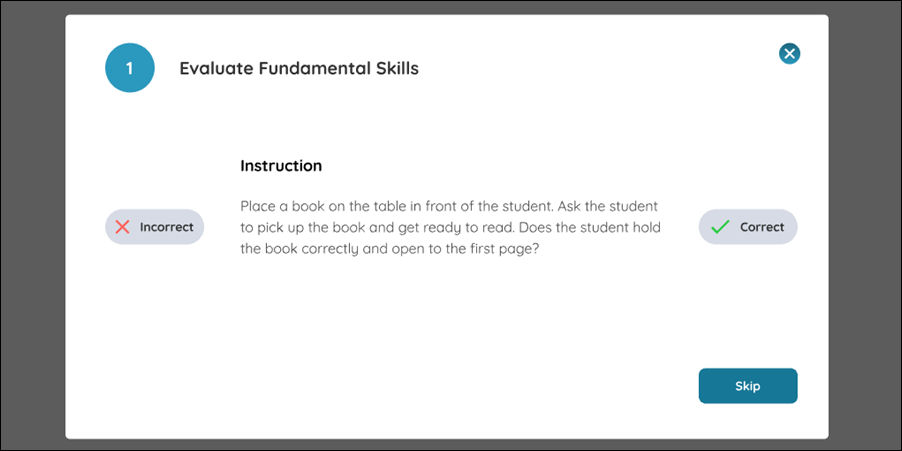
Follow the onscreen prompts to evaluate fundamental reading skills, such as Letter Recognition and Basic Phonics Skills, and determine a baseline reading level.

|
On each screen/prompt select the Incorrect or Correct buttons to move to the next section. You can select Skip on any step to head to the next step. |
Once you complete the Prescreener, you’ll receive a recommendation on whether to start with the first Level Screener passage or a Level A text.
Administering a Quick Word List Screener
You can use the Quick Word List Screener for Grade 2-6 students who don’t have assigned levels. This screener measures students’ recognition of words out of context.
Access it by selecting the Quick Word List Screener button on the Select Screener Method page.
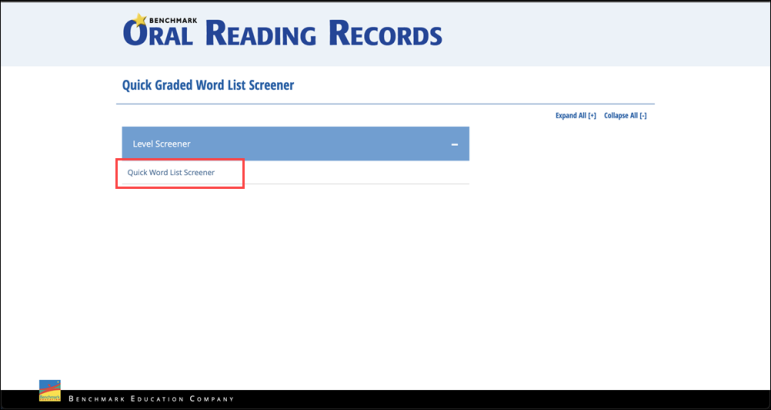
You will see a page open in a new tab that says “Quick Graded Word List Screener”. Select the button that says Level Screener, and then select Quick Word List Screener.
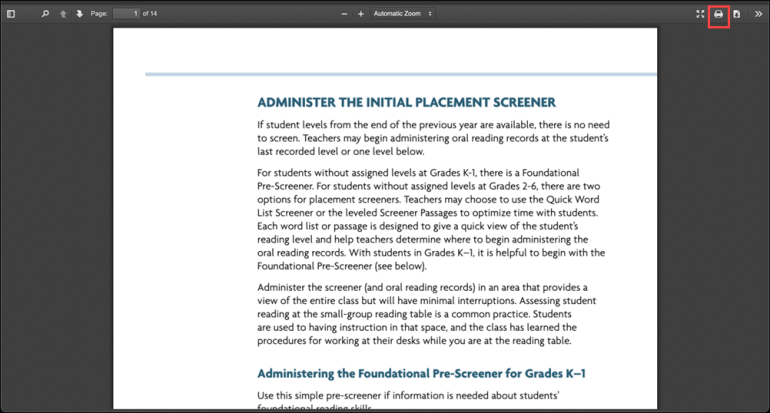
The Quick Word List Screener will open in a new tab. Select the Print icon in the top right corner.
On your browser’s Print modal, print pages “2”, “3”, and “4” of the document.
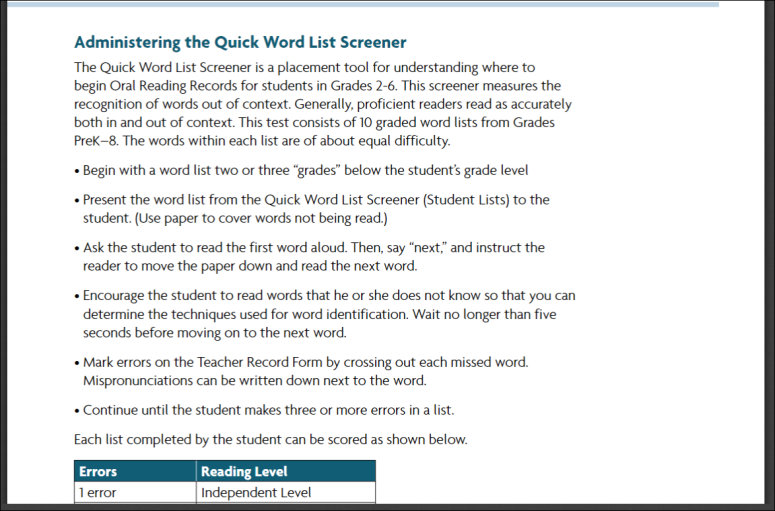
The second page provides instructions on how to administer the Quick Word List Screener. The third page is the Teacher Record Form, and the fourth page is the student’s word list.
Selecting a Screener Passage
You can use a Screener Passage for Grade 2-6 students who don’t have assigned levels. These screeners measure a student’s recognition of words in context.
Access it by selecting the Screener Passages button on the Select Screener Method page.
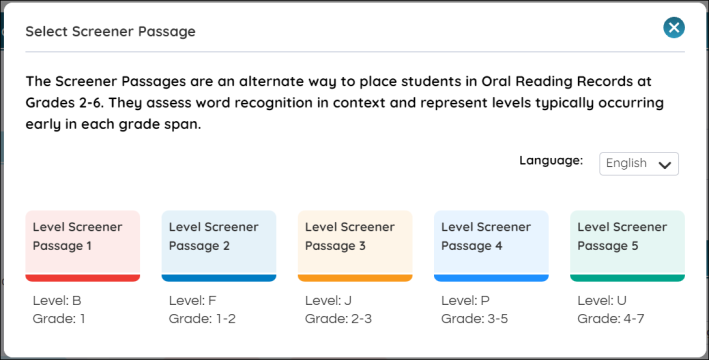
1. Choose a Level Screener
Select a screener passage by choosing one of the leveled passage icons the on the screen. The Reading Level and Grade range for each screener is listed underneath the passage icon.
If you think your student might be too early in their reading development to attempt one of the level screener passages shown, select the Prescreener.
2. Select a Method to Administer the Level Screener
First, select how you would like to administer your level screener.
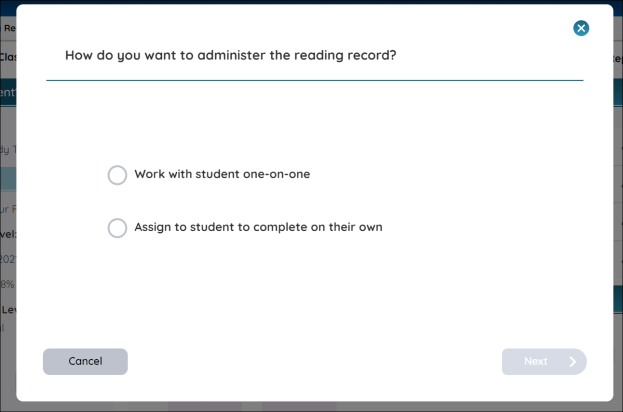
If you select to work one-on-one with a student, then you’ll have to select the method of administrating the level screener.
_625x416.png)
You can deliver the level screener to the student using a printed text or through their device (tablet, laptop, PC). Keep in mind that as soon as you complete the Administer Assessment steps (“a.” or “b.”, below), the record will open and prompt you to begin marking your students’ reading. If you’d like, you can always return to the newly created record to actually work with your student later.
If you assign the student to complete the level screener on their own, you will be see the assignment creation screen. The student will record their level screener to be reviewed a teacher.
a. Print the Passage for the Student
Select this option if you’d like to print the selected passage. Select the Printer tile, then press Next to continue to the following screen:
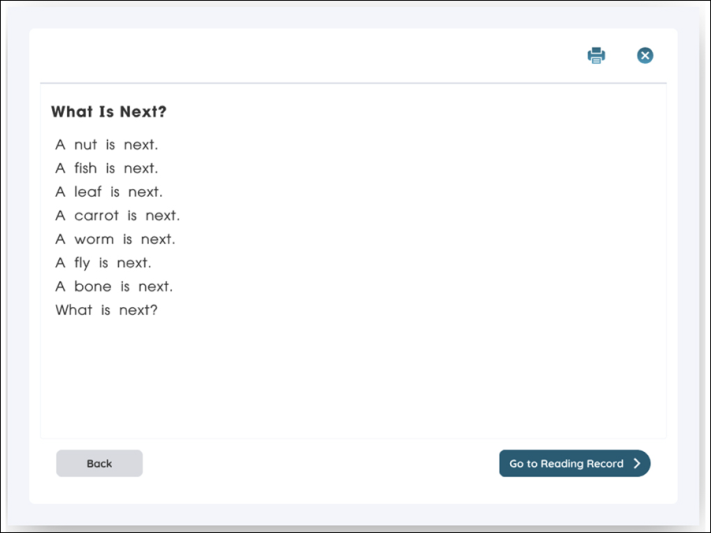
Select on the Printer icon at the top of the page to print the passage for the student. Once you’ve printed the passage, select Go to Reading Record to administer the level screener with your student.
b. Send to Student Device
Select this option if you’d like to send the passage to the student’s device. Select the Paper plane tile, then press Next to go to the Assign to Student page.
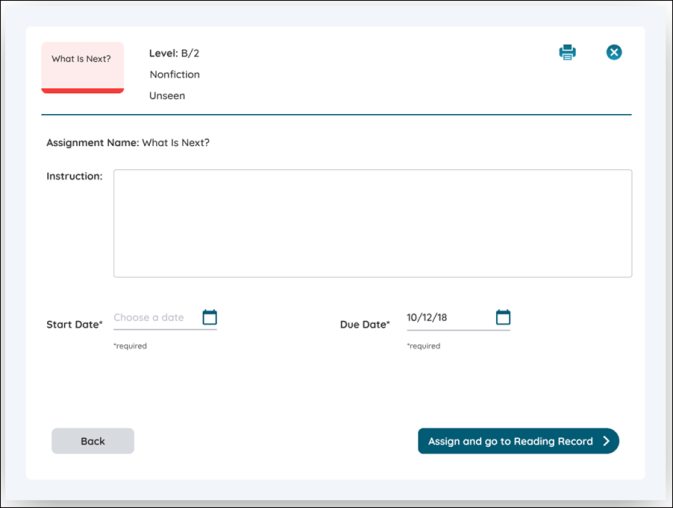
On the Assign to Student page, type any special instructions to the student in the Instructions box, then select a start date and end date using the calendar buttons at the bottom of the screen. By default, the start date is the day you’re assigning the assignment.
Press Assign and go to Reading Record to begin the session. Your student can open the level screener from their Assignments list in Benchmark Universe.
Administer a Level Screener
Follow the steps below when you are ready to begin a level screener.
- Begin the Level Screener.
The Level Screener is considered “in progress” when a student opens the assignment from their Assignment List or as a soon as a teacher marks a student’s reading behavior on their device.
- Annotate the student’s passage as they read.
As the student reads the text, listen carefully and annotate the passage by selecting on any word or diamond (space) in the text and using the Reading Behavior popup menu. (Find out more about annotating passages in Marking an Oral Reading Record Passage).
- Review the Metrics
The Metrics Section displays your student’s Error Rate and Accuracy performance on the level. As you mark errors, the metrics change. The metrics are:
- Error Rate: the number of words in the passage divided by the number of errors your student made. If the rate is 1:10, it means your student made 1 error for every 10 words read.
- Accuracy: (total words in the passage minus # of errors) divided by total words in the passage, multiplied by 100.
Click the “i” icon to read information Metrics.
- Select the Next button to continue to the Comprehension page.
Testing a student’s comprehension of a passage is an important step in determining their reading level. The Comprehension page will help you evaluate the student’s understanding of the text. All questions must be answered to determine which reading level is likely appropriate for a student.
- Select the Next button to continue to the Summary Page.
Use the Summary to review your student’s performance on their Level Screener. It gathers important information from the previous steps and shows it all in one place. There are two sections in the Level Screener Summary, Reading Behaviors and Error Analysis.
If you’d like to print the Summary, select the Print Summary button on the sidepanel under the “Reading Record” heading. In addition to all of the information provided on the Summary page, the printout includes the text of the Passage along with any reading behaviors or MSV cues you’ve marked.
Select the Next button to return to the Student Overview page.
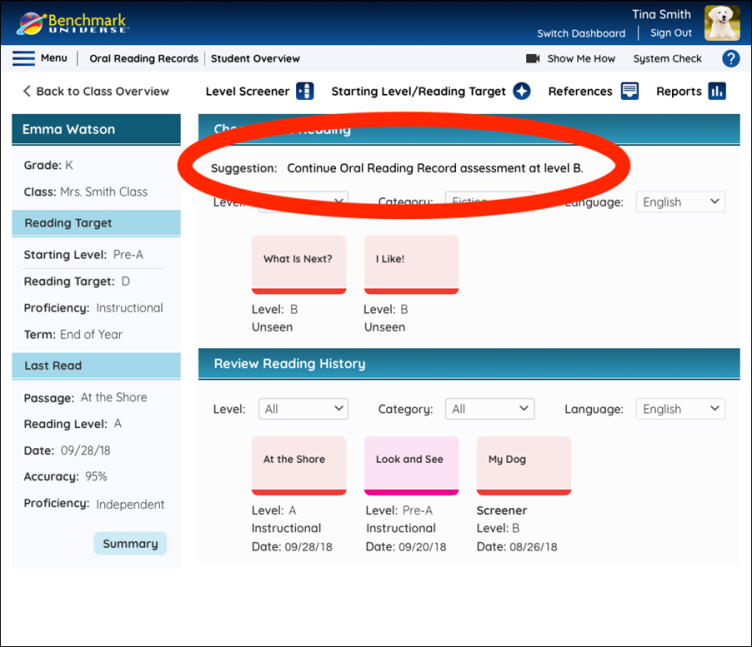
A recommendation for the next reading level will appear on the Student Overview at the top of the Choose Next Reading section. The reading level is determined by how many questions they answered correctly on the Comprehension page as well as the number of mistakes recorded as they read.
Last Updated: February 14, 2024